Pano to 360
Converting 360° Imagery to Panoramas: A New Perspective
Pano to 360
Welcome to another Momentum 360 blog! Our goal is to inform you on everything 360 related in our incredible industry. If this is your first time with us, welcome aboard! If you’re coming back for a second read with us, welcome back! In this one, we’ll go over pano to 360!
If you’ve ever been entranced by an immersive virtual tour or gazed into a virtual reality headset, you’ve likely experienced the magic of 360° imagery. These images capture every angle of a scene, offering an immersive experience that feels almost as good as being there. But sometimes, you might want to transform that all-encompassing view into a more traditional format – enter the panorama. This blog will explore the transformation from 360° imagery to panoramic images, its applications, and why one might choose to make this shift.
Understanding the Difference
First and foremost, let’s establish a foundational understanding:
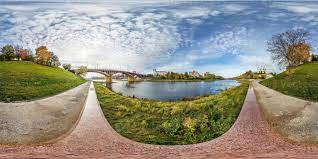
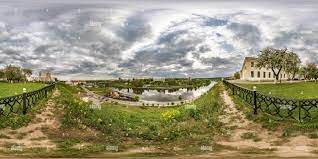
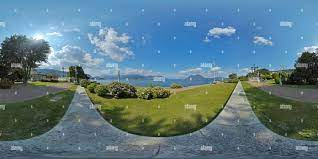
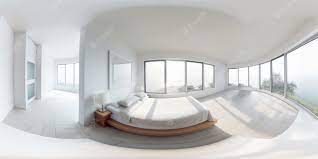
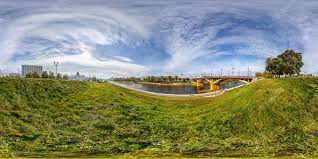
- 360° Image: As the name implies, a 360° image captures every angle of a scene. Think of standing in one spot and turning around in a full circle; this is what a 360° image encompasses. These images are often spherical or equirectangular in format, giving viewers the sensation of being ‘inside’ the image.
- Panorama: A panorama is a wide-angle view of a scene, typically captured in a wide rectangle. It might encompass a broad landscape or a sprawling cityscape, offering a wide but flat view.
Why Convert from 360° to Pano?
At first glance, one might wonder why anyone would want to convert from a fully immersive 360° image to a mere panorama. Here are a few compelling reasons:
- Usability & Accessibility: Not every platform or device supports 360° images. By converting to panoramas, creators ensure their images can be viewed on a broader range of devices and websites without the need for specialized software.
- Narrative Control: A panoramic image can guide the viewer’s gaze in a specific direction. Instead of allowing viewers to look everywhere, creators can curate their focus on a specific part of the scene.
- Printing & Framing: While 360° images offer an unmatched digital experience, they are not easy to print and frame. Panoramas, on the other hand, can be printed in high resolution and showcased on walls, giving photographers more options to monetize and showcase their work.
The Transformation Process
So, how does one transform a 360° image into a panorama? Here’s a basic outline:
- Choose the Scene: The first step is deciding which part of the 360° image you want to focus on. This could be a stunning sunset, a historical monument, or any other focal point.
- Software Selection: There are many software options available, both free and paid, that allow for the transformation from 360° to panorama. Some popular choices include Photoshop, PTGui, and Hugin.
- Rectilinear Projection: Using your chosen software, apply a rectilinear projection. This will ‘flatten’ the 360° image and transform it into a wide-angle panorama. This process might require some adjustments to ensure the final image is not distorted.
- Refinement: After projection, refine the image by cropping, adjusting brightness, contrast, and other parameters to make the panorama look its best.
Innovative Applications
The process of converting from 360° to panorama has led to innovative applications. Artists and photographers have begun to play with perspectives, creating abstract art and thought-provoking images. Businesses use panoramas derived from 360° images for marketing, giving potential customers a broad view of their premises or products.
In the realm of real estate, panoramas provide potential buyers with a wide-angle view of properties, offering a taste of the immersive 360° tours they might experience later. Travel agencies use panoramic images to showcase destinations, giving travelers a teaser of the immersive experiences they can expect upon arrival.
In Conclusion
While 360° imagery offers an immersive experience, the conversion to panoramas opens up a new world of possibilities. Whether for practical reasons like printing or for artistic explorations, the transformation from 360° to pano allows for a fresh perspective on familiar scenes. In the evolving landscape of photography and digital art, the bridge between these two formats offers countless opportunities for innovation and creativity.
The Magic Behind 360° Tour Creation: A Comprehensive Guide
Virtual tours have taken the digital world by storm, offering users an immersive experience that brings them as close to “being there” as technology currently allows. From real estate showings to virtual vacations, 360° tours provide a dynamic way to explore spaces from the comfort of one’s home. If you’re keen to jump into the world of 360° tour creation, this guide will walk you through the basics.
Pano to 360
1. Equipment Essentials
Your first step into 360° tour creation begins with the right equipment:
- 360° Camera: The market is flooded with options, from consumer-friendly cameras like the Ricoh Theta and Insta360 to professional-grade gear like the Matterport. Your choice will depend on your budget and desired level of detail.
- Tripod: A tripod ensures stability, helping to capture clear and consistent shots. Some 360° cameras come with specialized tripods that allow for better alignment and easier stitching.
- Lighting: Natural light works best, but additional lighting equipment can help in poorly lit areas.
2. Planning Your Shoot
Before you start capturing images:
- Storyboard: Plan out your tour, determining the key points of interest and the logical flow from one area to the next.
- Preparation: Ensure spaces are clean and well-organized. Remove any personal or sensitive items if shooting a residential or business space.
- Time: Choose a time with consistent lighting, ideally avoiding times when sunlight creates harsh shadows.
3. Shooting Your Scenes
With preparation out of the way, it’s time to dive into the shoot:
- Positioning: Place your camera at a central point in each room or space, ensuring it’s at eye level for a natural perspective.
- Multiple Shots: Take multiple shots, especially in larger spaces, ensuring there’s an overlap. This will assist in stitching the images together later.
- Consistency: Maintain consistent camera settings to ensure uniform exposure and color balance across your tour.
4. Stitching & Editing
Once you’ve captured your scenes, the next step is to compile and polish:
- Stitching Software: Tools like PTGui, Hugin, or the software that comes with your camera will allow you to seamlessly blend your images into a 360° sphere.
- Editing: Post-processing is crucial. Adjust brightness, contrast, and saturation to ensure consistency. Remove any distortions or imperfections and ensure all images are aligned perfectly.
5. Choosing a Hosting Platform
With your 360° images ready, the next step is to choose a platform to host and present your virtual tour:
- Dedicated Platforms: Websites like Matterport, Kuula, and Tourweaver offer specialized tools for creating and hosting 360° tours, complete with interactive hotspots and navigational controls.
- Self-hosting: If you have the technical know-how, you can host the tour on your website, using plugins or custom code to integrate the 360° viewer.
6. Enhancing Your Tour
To elevate your tour from good to great:
- Hotspots: These interactive points provide more information, redirecting viewers to different scenes or offering additional details about objects or areas in the tour.
- Audio: Incorporate background music or voiceovers to guide viewers through the space.
- Interactive Elements: Depending on your platform, you can integrate videos, image galleries, or clickable links to provide a richer experience.
7. Promoting Your Tour
With your tour live:
- Social Media: Platforms like Facebook support 360° images, making it a great space to showcase snippets of your tour and drive traffic.
- Embed on Your Website: Use the tour as a centerpiece on your site, giving visitors an engaging experience the moment they land.
- Collaborate: Partner with businesses, bloggers, or influencers to feature your tour on their platforms, expanding its reach.
In Conclusion
Creating a 360° tour may seem daunting, but with the right tools and a methodical approach, you can craft immersive experiences that captivate audiences. Whether you’re showcasing a property, promoting a tourist spot, or providing a virtual peek into a business, 360° tours offer a dynamic and modern way to present spaces in the digital age. Dive in, and bring your spaces to life!
Pano to 360
The Art of Panorama Creation: A Step-By-Step Guide
In the world of photography, panoramas stand out for their ability to capture vast, breathtaking landscapes or sprawling urban skylines. These wide-angle shots offer viewers an extended view of a scene, often evoking a sense of awe and wonder. If you’re curious about diving into the world of panorama (or ‘pano’) creation, this guide will steer you through the basics and beyond.
1. Understand the Panorama
A panorama is essentially a wide-angle view of a scene, usually achieved by stitching together multiple images. The result is a continuous and elongated perspective, reminiscent of what one might see with the naked eye when turning their head from side to side.
2. Gear Up
Before embarking on your pano journey, ensure you have the right equipment:
- Camera: While specialized panoramic cameras exist, most modern digital cameras or even smartphones are apt for the job.
- Tripod: To ensure stability and consistency across shots, a tripod is indispensable. For best results, use one with a panoramic head, allowing for smoother horizontal rotations.
- Lenses: A wide-angle lens is ideal, but most standard lenses will work. Avoid fisheye lenses, as they can distort the image.
3. Scouting & Planning
Panoramas thrive on expansive views. Scout for locations that offer:
- Depth: Landscapes with layers (foregrounds, mid-grounds, and backgrounds) create depth and interest.
- Consistent Lighting: Sunrise and sunset, often termed the “golden hours,” offer the most consistent lighting.
4. Shooting Technique
When capturing your shots:
- Orientation: Shoot in portrait mode. This might seem counterintuitive, but it provides more vertical coverage, which can be beneficial when stitching images together.
- Overlap: Ensure each shot overlaps the previous one by at least 30%. This makes the stitching process smoother.
- Consistency: Maintain the same exposure settings for all shots to ensure uniformity. This is where manual mode comes in handy.
- Stay Level: Ensure your camera stays level as you rotate to avoid a tilted final image. This is where the tripod’s bubble level can be invaluable.
5. Post-Processing: Stitching it Together
Once you’ve captured your series of images:
- Software Selection: There are numerous software options for stitching photos, ranging from free tools like Hugin to professional ones like Adobe Lightroom or Photoshop.
- Stitching: Load your images into your chosen software, and allow it to automatically align and blend them. Most software will do an excellent job, but manual adjustments might be needed.
- Cropping & Adjusting: After stitching, crop any uneven edges and adjust exposure, contrast, and saturation as necessary to enhance the final image.
6. Perfecting Your Panorama
While a stitched panorama can already be stunning, consider these enhancements:
- Sky Replacement: If your panorama includes a bland sky, consider replacing it with a more dramatic one. Just ensure it matches the lighting and mood of the rest of the image.
- HDR: For scenes with high dynamic range, consider shooting bracketed exposures and combining them into an HDR panorama.
7. Sharing Your Masterpiece
With your panorama ready:
- Digital Platforms: Websites, social media platforms, and photography forums are excellent places to showcase your work. Some platforms, like Facebook, even offer a unique scrolling feature for panoramas.
- Print: Consider turning your panorama into a large print or canvas. Its elongated format can make for a striking wall piece.
In Conclusion
Panorama creation is both an art and a technical skill. It combines the photographer’s eye for captivating scenes with the precision required to capture and merge multiple images seamlessly. The result, when done correctly, is an image that captures the grandeur of a scene in a way that a regular photograph might miss. So, equip yourself, scout that perfect location, and immerse yourself in the beautiful world of pano creation. The horizon is, quite literally, expansive!
Pano to 360
Momentum 360 is a Premiere Small Business and Real Estate marketing company in Philadelphia and tri-state area. Our main service offerings are 3D Virtual Tours powered by Matterport, as well as photography and videography. We are both a Matterport Service Provider and Google Trusted Photography agency. While 3D Virtual Tours started in real estate, they are versatile and applicable across every industry.
Momentum 360 specializes in virtual tours for real estate, small businesses, restaurants, retail, healthcare, professional services, and much more. These virtual tours help our clients showcase their business online, while also allowing them to rank higher on Google with SEO, and get more followers on social media. Call for a quote.
Pano to 360
This article was originally published on momentumvirtualtours
