360-Degree Photography and Virtual Tour in 2022’s Real Estate Sector

360 real estate photography
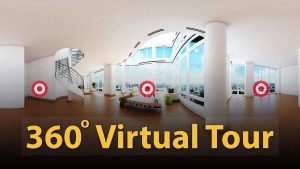
Nearly every type of business relies heavily on technology. Real estate agents are no exception. One of the best things a real estate agent can do to remain competitive and stand out is to stay up-to-date with the latest technology trends. A 360° virtual tour of a property is the newest trend to emerge for real estate agents. As 360 real estate photography becomes more popular, buyers can see a more complete picture of the homes they may be interested in purchasing. It is useful in a post-pandemic world, where potential buyers can take a 360-degree virtual tour instead of attending an open house in person. We are seeing an exponential increase in 360 virtual tours in real estate listings for the first time now. What exactly is 360 real estate photography? Is there something special about this decade-old service that has suddenly become all the rage, growing in both volume and popularity?
360° Real Estate Photography – What is it?
The purpose of 360 degree real estate photography is to combine virtual images of a space to create an immersive and interactive experience that can be viewed on a computer or mobile phone. Virtual 360° home tours or VR tours (virtual reality) simulate existing properties by using a series of 360° photos or videos. Additional multimedia elements such as audio, text, or graphic overlays can also be included in virtual tours.
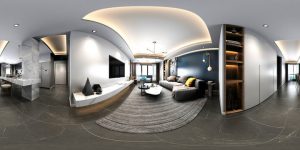
Online listings are one of the best ways to present a property for sale or rent without having to physically see it. Real estate 360 photography creates a seamless view of a room by taking multiple images from every angle of the room and stitching them together. As a result, viewers can see the entire space, including all four walls, ceiling, and floor. You can click on the different sections of the image to move through the room virtually (as if the viewer was actually standing there). With 360 real estate photography, viewers can experience spaces they otherwise wouldn’t be able to see in person through interactive images.
Rise of 360 real estate photography
A national association of Realtors report says the global pandemic has accelerated changes in homebuyers’ behaviors. There was a 278% increase in demand for 360 virtual tours during the pandemic, according to some real estate companies. This overwhelming demand for 360 real estate photography is here to stay, according to industry experts. So, why is it so popular (besides COVID of course)? In 360 real estate photography, improvements have mainly occurred in these three areas:
- Picture Quality
- Viewer Engagement
- Layout
Let’s look at each improvement in 360 real estate photography in order to better comprehend the rise of 360 real estate photography.
360 Photography Making a Splash With Improved Image Quality
The remarkable improvement in image quality is one of the main reasons for the spike in demand for 360 real estate photography. The standard method of real estate photography, in which the real estate agent took a single photo of a room and left it at that, was used by most sellers and renters before 360 photography came along. Nevertheless, this kind of photography was not able to provide viewers with an immersive experience of the space. This led to buyers and sellers being uncertain of what they were seeing. As a result of advances in technology, today’s 360° real estate photography is of a superior quality. A variety of 360-degree cameras are now available that can create high-resolution virtual tours of all types. Sellers and agents now have the opportunity to showcase their spaces from every angle with 360 real estate photography. Multiple, high-quality images can be stitched together to create 360 panoramas.
Viewers Can “Step Inside” 360° Images
Thanks to 360-degree photography, potential buyers can now step inside a virtual space and explore it with ease. These days, tech has gotten so advanced that prospective buyers can virtually walk through their favorite home listings as if they were physically there – all thanks to cameras that allow viewers to see through all four walls, as well as the ceiling and floor. 360 photography has changed real estate marketing forever. With a wide range of 360 cameras available and new editing platforms that provide a seamless, interactive experience of the house, 360 photography has become the biggest advancement for real estate marketing.
An Accurate View of the Layout
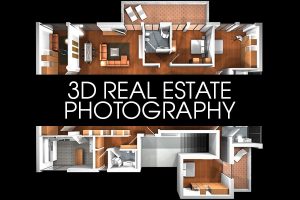
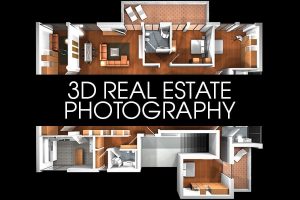
The value of 360 real estate photography goes beyond the quality of images and immersion by providing floor plans that are accurate. With the right editing software and a minimal budget (if any), this can be accomplished in post-production. Floor plans are an integral part of any professional real estate listing. The last image, which is usually a floor plan of the home, is often what makes viewers speed through slideshows of properties. It may also include measurements of each room. In addition, a detailed floor plan can compel potential buyers to click through a virtual tour of the listing, especially if the dimensions of the floor plan look promising enough to accommodate the buyer’s furniture. As a result, this makes potential buyers more likely to purchase the property.
The Benefits
It gives the homebuyer a sense of the place through virtual tours and 360 degrees panoramic photographs. By allowing them into the house, you are letting them see every corner and crevice. They will be able to imagine themselves living there. Still photos and bulleted lists of details simply cannot compete with that. The homebuyer can click around, zoom in and out, and examine details up close with most virtual tours. When viewing a virtual tour, a home buyer can click around, zoom in and out, and examine details up close. This level of transparency is crucial when making a major decision as big as buying a house. Talking about the benefits, the major ones include:
- Easy and fast to make
- You have more time to pursue high-intent buyers instead of showing properties to low-intent customers
- Visiting the property is not subject to a time limit; clients can stay as long as they wish
360-degree photos and virtual tours are like the whole book if a picture is worth a thousand words. 360-degree photos are the best way to visualize an interior space of a real estate, and now anyone can take super-high-quality 360-degree photos. The use of these virtual tours by realtors is growing more popular, but what are the basics of creating them?
What’s Better, a Panoramic or DSLR Camera?
Even though there are special cameras designed for taking epic panoramic photos, we recommend shooting with a DSLR and stitching the photo with a software program. There are panoramic cameras going for as much as $10k, but unless you’re planning on photographing the Aurora Borealis, you’ll be just fine with a DSLR (or even a nicer point-and-shoot or your android/iphone camera).
Starting Out: What You Need
Zillow & Google Accounts
In order to register for Zillow 3d Homes, you’ll need a Google account and access to Google Tour Creator.
A SmartPhone 360° Camera (Optional)
First Method: Google Tour Creator
You can create your first 360-degree tour using Google Tour Creator by following these steps.
- Get Your 360° Photos
If you have a smartphone camera attachment or a smartphone that takes panoramic photos, follow the instructions on your device. In addition to standard photos of fixtures and lighting, you may also want to take standard photos of any other features you wish to display to buyers and sellers. When you want to expand or improve your VR tour, you’ll be able to use this information. Organize all your photos onto your desktop or laptop in an easily accessible folder.
- Create a Tour in Tour Creator

360 real estate photography
Launch Google VR Tour Creator by logging into your Google Account and clicking ‘Get Started’. Next, select ‘New Tour’. In addition to naming your tour and adding a cover photo and a description, you will be asked to add a description. Don’t be too descriptive when naming your tour. Only include the address or the name of the property you will be showing. You should produce a professional looking cover photo. You should make sure each photo you put on your tour represents you and your company.
- Learn How to Create Your First Tour Scene
After you create a tour and provide a name, description, and cover photo, you will be prompted to add a scene. Select the location where you saved your 360° photos and click ‘Upload’. You can then drag and drop your first scene photo. Your image can be rotated or positioned however you like once you have uploaded it. Then click on ‘Add Scene’ to start.
- Make Edits to Your Scene
When you have finished creating your first scene, you will be able to edit your 360° VR photo and provide additional information. The following items can be modified.
Title: For example, Kitchen, Living Room, etc.
Address: Location of the property.
Details about the photo: A full description.
Starting View: The starting point of your scene should be located where in the image you want it to begin.
Credits: Give credit to the photographer if they took the picture.
- If Desired, Add Audio, Narration, and Points of Interest
Once your scenes are created, you can go back and improve your VR tour. Additional ambient audio, narration, and points of interest can be added to each scene.
- Points of Interest
You may also want to have a few ‘points of interest’ in your scene if you would like to attract attention to fixtures, lighting, etc. The first step to adding a point of interest is to click ‘Add Point of Interest’ at the bottom of the scene information panel. Narration and images can be added here as well. In the preview area, adjust where you wish to place the point of interest in the scene once you’ve added it. By doing so, viewers will be able to click on the topic of interest as they progress through and learn more about it.
- Narration
Narrations can add a personal touch to your VR tour and provide your clients with valuable information. Use the Voice Memos app on your iPhone or Smart Recorder on your Android device. Give a brief description of what your viewers are looking at for each scene. After you finish recording, save the MP3 file, click the narration icon at the bottom of your scene, and then upload the file.
- Save the Tour and Publish It
Click ‘Publish’ at the top after you have finished creating your scene. It will ask you whether your scene should be private or public. Once you publish your scene, click the ‘copy link’ button. By sharing this link, you will be able to share it on Facebook, Twitter, and Google Expeditions. If you wish, you can paste this link directly into an email and send it to your clients. Using a computer, laptop, smartphone, or a tablet you and your clients can view this tour.
Second Method: Zillow 3D Home Tours
Using Zillow 3D Home, iPhone users can create virtual real estate tours they can share privately or attach to a current listing on Zillow. With an iPhone (7 or later) or a 3D camera, users can create a free virtual real estate tour. For 360-degree photos, Zillow recommends Ricoh’s Theta V or Theta Z1 cameras. The following steps will help you create your first Zillow 3D Home Tour.
- You can download the Zillow 3D Home Tours App from the Apple App Store for your iPhone.
- Log into the app with your iCloud account, Gmail account, or Zillow account. Click “Start Capture”. Click “Use iPhone Camera”.
- Zillow provides you with a variety of pictures of your apartment or house once you have added your address. You can now capture your panorama after you select the first room you wish to include.
- Vertically hold your iPhone against your chest. While following the app’s instructions, slowly rotate to the right in a full circle. It will prompt you to slow down or redo a part of the panorama if you go too fast or if the app fails to capture an area.
- Ensure that your 360° photos of each room aren’t blurry or misaligned and retake them.
- Each room will require a high-quality panorama photo. Repeat steps 3-5 until all rooms are covered.
- And you’re done! For editing, publishing, and sharing your tour, log in to your Zallow dashboard.
What 360 Real Estate Photography Can Do for You

360 real estate photography

Since 360 photography became popular in the real estate industry, the amount of time and resources needed to create virtual tours has been drastically reduced. In the past, scanning every five feet of the space would require lugging around a huge CPU tower. Fortunately, today’s 360° cameras are lightweight, portable, and easy to set up. In addition, they are highly efficient. In one shot, they are capable of capturing the whole room. Additionally, we can use multiple camera options and post-production platforms to achieve the desired image. Agents now have more options than just one company when it comes to listing platforms. This provides greater control over digital content to them. The 360-degree real estate cameras of today are better – more affordable, faster, and more efficient.
This article was originally published on momentumvirtualtours
